For months and months I have been eyeing the most gorgeous upholstered beds and headboards from all sorts of different shopping avenues....
Like this one from SerenaAndLily.com for the cool price of $2,400.00 oh and $300 shipping.....GASPPP!!

Or this one from Ballard Design for $739.00...and $70.00 shipping...
 "Stevenson Nailhead Headboard")
Or how about this FABULOUS number from Deco by Designers Inc....makes me think of one of my best friends Ruthie...it's literally screaming her name!!! Their prices START at $500 for a twin bed....


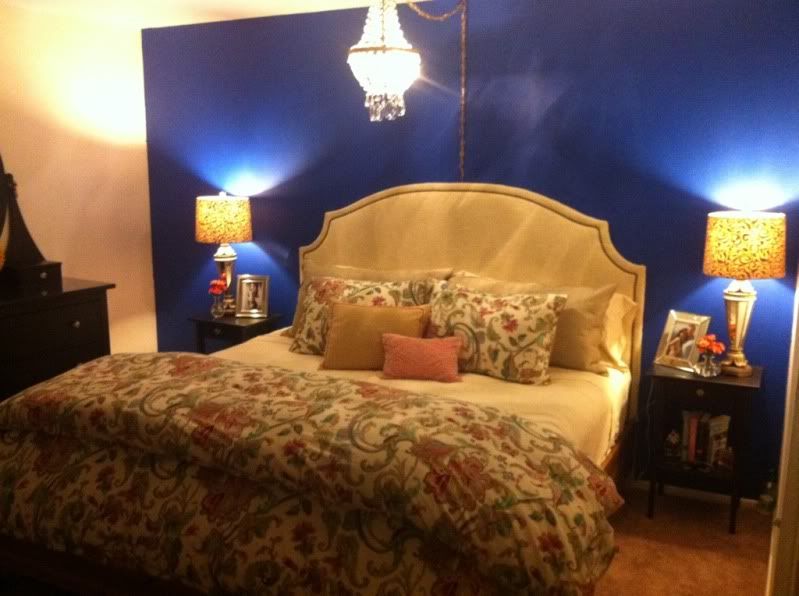
And finally there is this simple and chic hang on the wall headboard with a gorgeous Rustic nailhead trim made by......ME (and HB too!!)
So how did we make this chic and AFFORDABLE headboard you might ask?? It's simple....lets do this step by step...
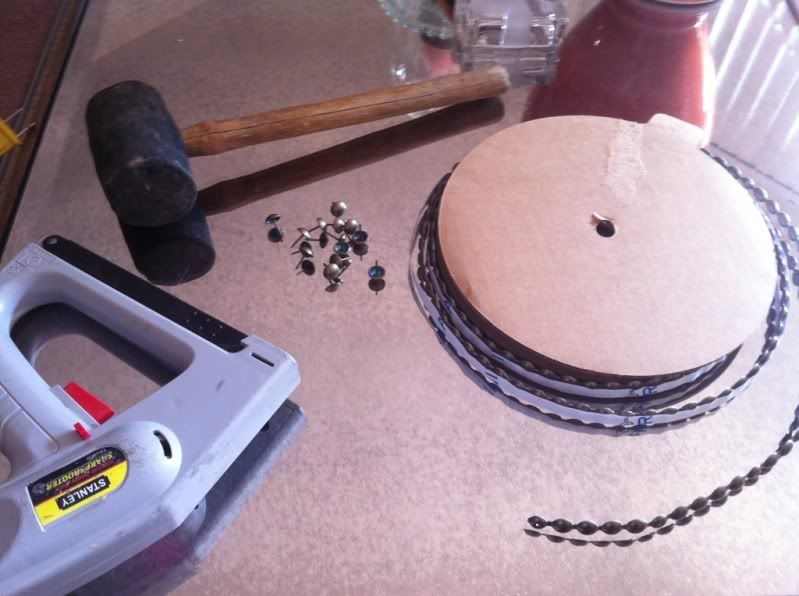
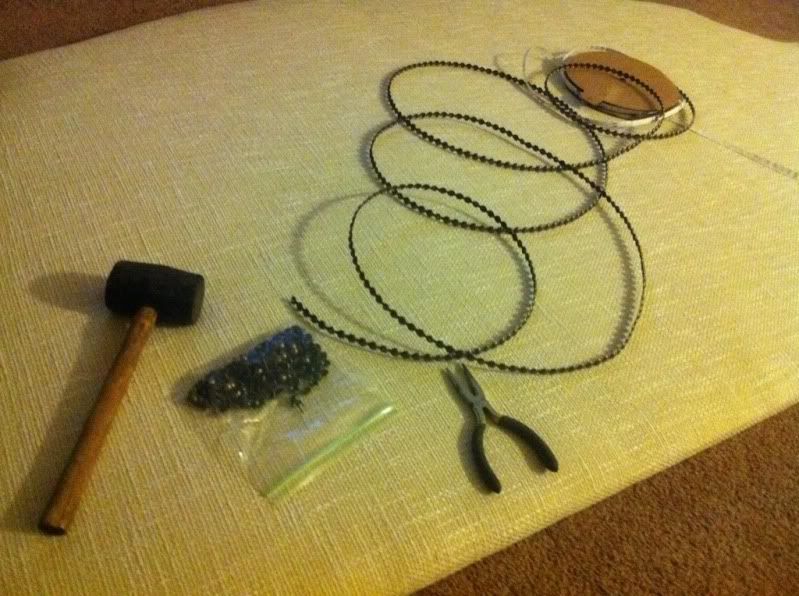
Materials:
Large piece of Plywood 1/2" to1" thick...make sure to measure the length of your mattress ahead of time and add one inch to each side for the perfect sized headboard.
2-3 layers of batting (found mine at Joanne's and needed 14 ft for a king bed)
Staple Gun
Scissors
Rubber Mallet
Needle Nose Pliers
Nailhead Trim Kit (Found mine on Ebay for $9!!)
Interlocking Bracket Wall Kit
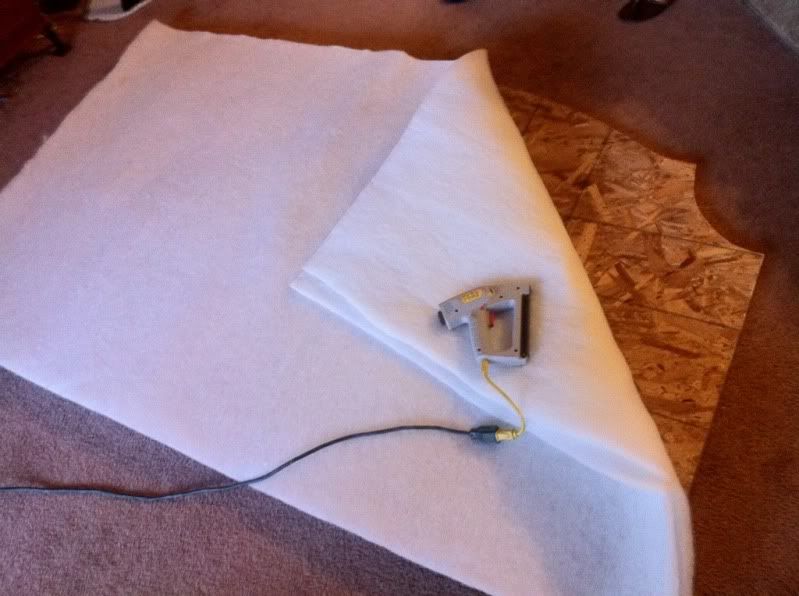
Depending on what shape you want your headboard to be, the height should be between 36 to 48 inches. HB and I wanted the curved corners so we chose 48" to give the bed some height in the middle. The shape must be drawn on the wood, cut with a jigsaw and then sanded down. To get the most even shape on both sides, we flipped the plywood corner from our original cut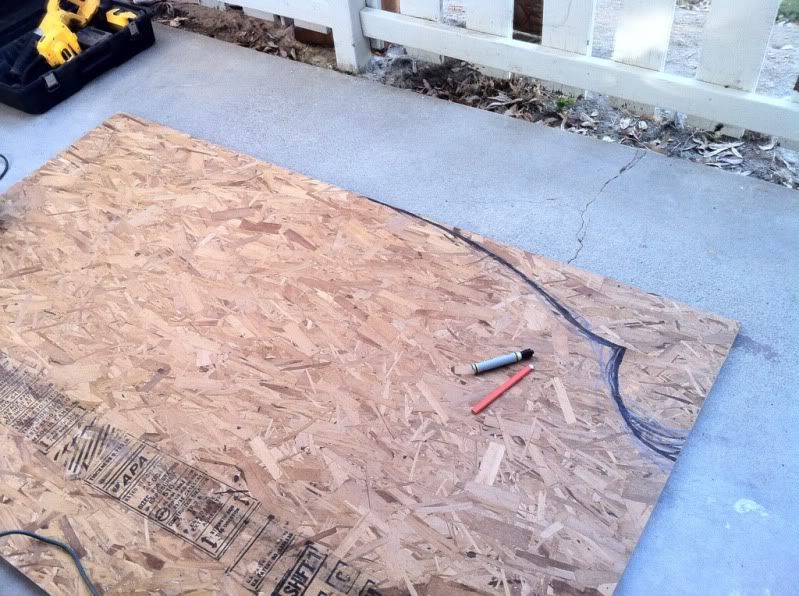 and traced the shape!
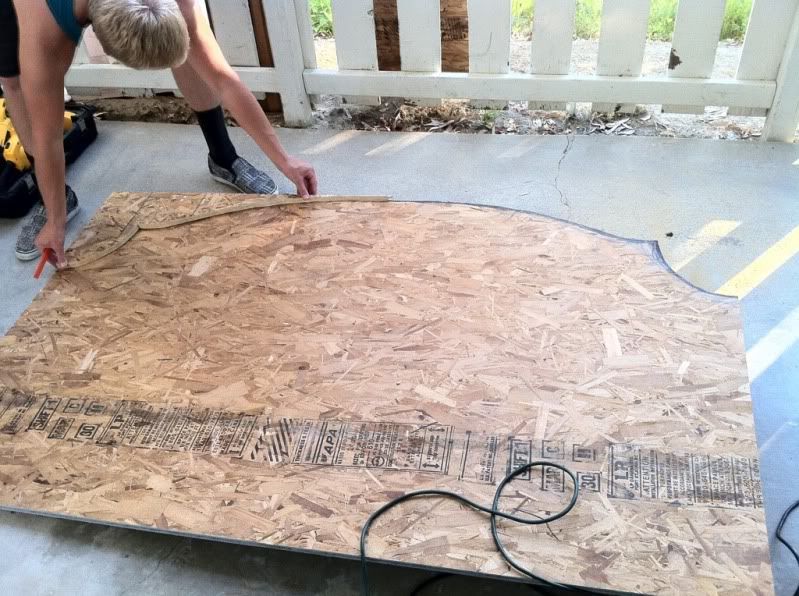
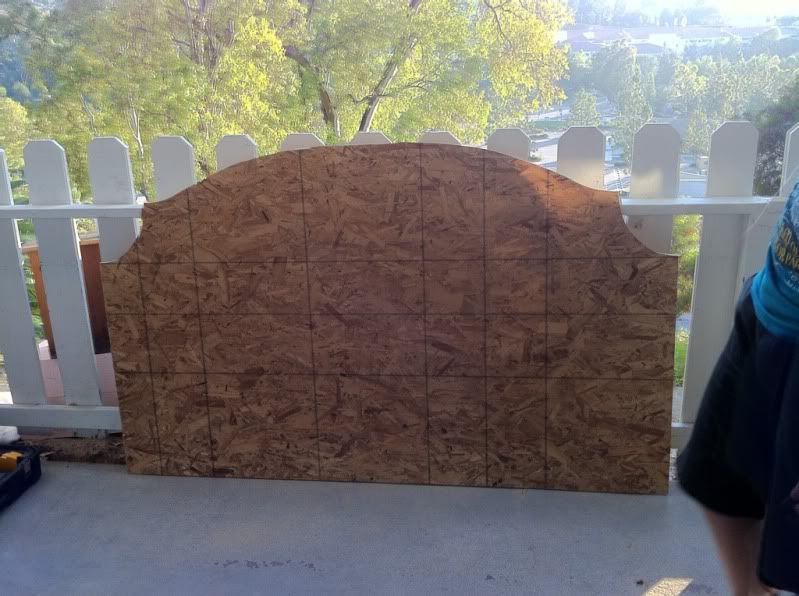
and traced the shape! Next, we laid the board on our living room floor and smoothed down two layers of batting to the front and flipped the board over to staple the batting to the back side. Make sure the batting is TIGHT so it doesn't ripple later on under the fabric. I also cut off extra batting from around the corners so it wouldn't make the headboard stick out from the wall too far.
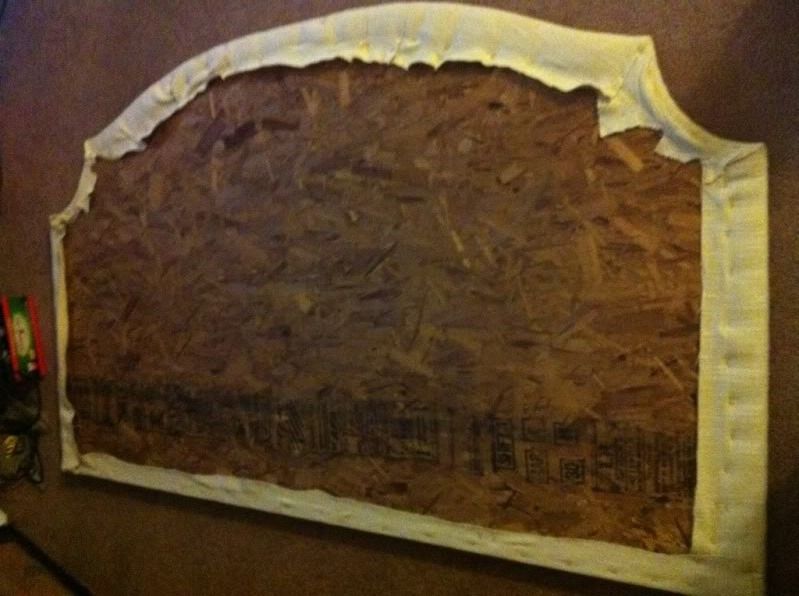
I did the same exact thing with the fabric, except this time i made two staple in the front, which I later removed, to hold the fabric in place while I flipped the board around. I chose a very thick and textured fabric from Joanne's by Robert Allan in the color Sand. It was on sale and I had a 20% off coupon :) Here you can see the detail in the fabric....GORGEOUS I KNOW!!
Next is the nailhead trim WHICH IS SOOOOO EASY TO DO!! I was amazed!! Once you figure out how far you want the trim to be from the edge of the board it is so easy to keep a straight line! I chose to have the trim approx 1" from the edges. Just hold the trim down, place the nailhead in and hold it with the pliers and hammer it in your the mallet. **NOTE** I ended up covering the mallet with a white dish towel since it started to leave black residue on the fabric!!
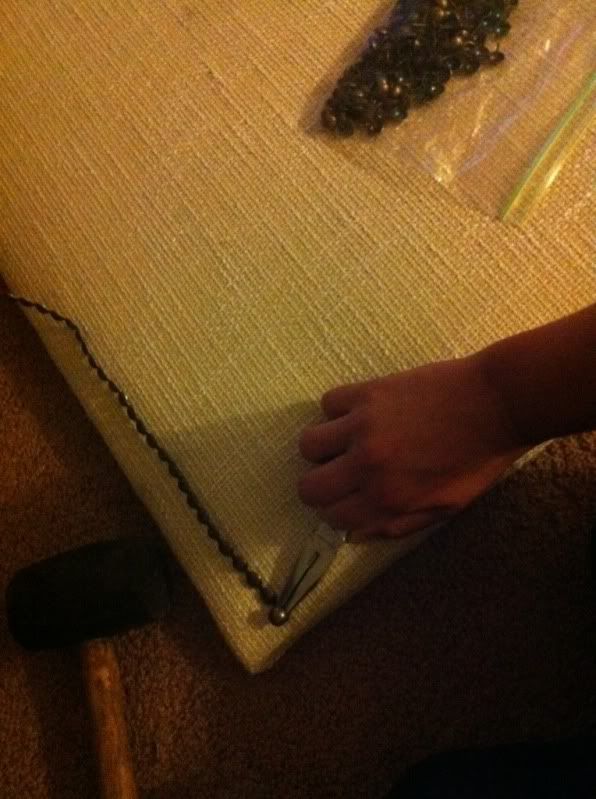
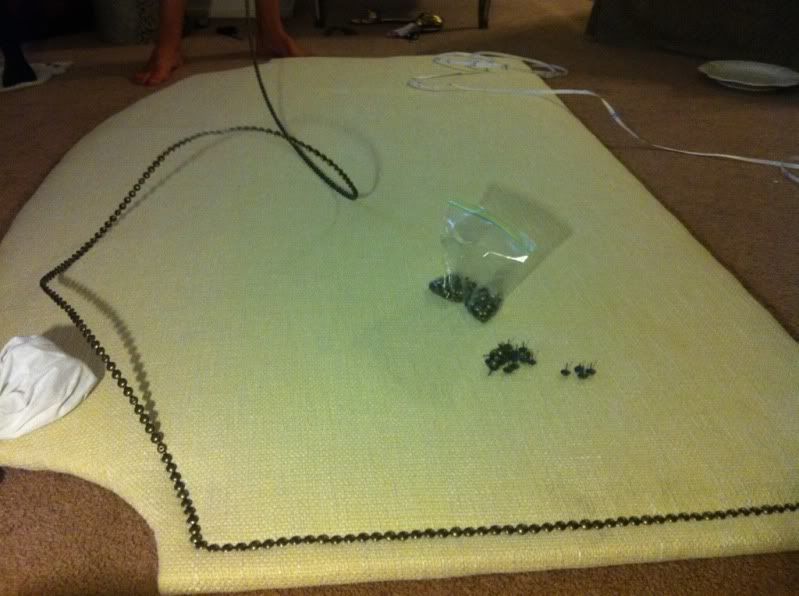
Once you have completed nailing in the trim, give the whole trim a good hammering to ensure everything is in place before you lift it up. The final step is attach the interlocking bracket to both the headboard and the wall. The bracket can be found at home depot and we chose one that could hold up to 100 lbs just to be on the safe side. 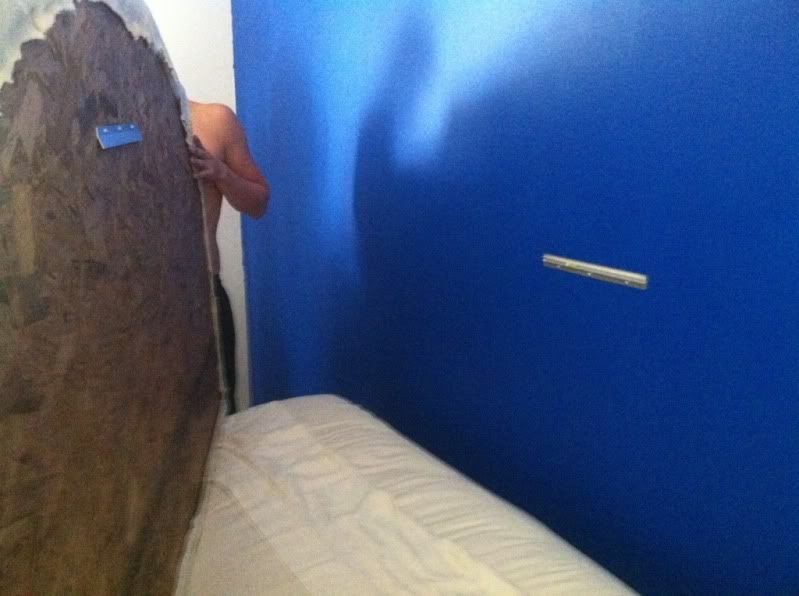
Just like hanging a picture, you slide your headboard down the wall until both pieces of metal lock in place....and VOILA!!

Total Cost Breakdown:
Fabric (2.5 yards): $46
Wood: $13
Nailheads:$9
Batting: $25
Wall Clips: $10
Total: $103
BEAT THAT YOU OVERPRICED INTERIOR DESIGNERS!!!
XOXO,
Mrs. S
PS: If I didn't explain anything well enough...please ask and I will make sure to re-vamp the directions to cater to my reader!! xx
I love love LOVE the color that you chose for your accent wall! Its absolutely stunning!
ReplyDeleteOh my gosh, Blaire! this is too cool. I'm going to make (my not so handy husband) help me make one of these soon. such a cool bedroom.
ReplyDeletewhat color nailhead trim did you use? french natural or pewter?
ReplyDeleteHi Lisa! Thanks for reading:) I used French natural as it has the perfect "antiqued" color! Best of luck on making your headboard!!
ReplyDeleteYou can make your own hangers from a left over piece of 1 x 4 (for the headboard, I'd use a 4' piece)by cutting the board lengthwise on a 45 degree angle. Hardwood is best, but pine from home depot will work, too. One side attaches to the wall, the other to the headboard. The 45 degree angle will slide together to make a tight fit. You will have to adjust the connection by a plywood spacer under the 1 x 4 on the headboard to account for the thickness of the fabric which will push the headboard away from the wall. maybe a little bit more work, but its basically free. Ddy
ReplyDelete