Tuesday, November 22, 2011

Tablescapes

I'm totally and utterly engulfed and researching tablescapes right now! It has me obsessing over the fact that HB and I are looking to buy a house and I keep drooling over my day dreams of dinner parties and setting the table. I mean really??...what's a girl to do with all this gorgeous china and crystal and no place to party!! With Thanksgiving a few days away , I put my full effort into google imaging some ideas for all of you.

I know...not very difficult to google image but at least it will give you my visions of Thanksgiving...


Gorgeous blues and oranges will brighten any holiday festivity. I love the busy tablecloth and mixed vases...so chic!
I love this cheap and easy use of fruit, a thumb tack and paper to make a place setting. So fall and so organic. Again...notice the blues??
A cute pan from Williams Sonoma will have the kids coming back for more with a yummy Cinnamon cake recipe!!
For any of my coastal living friends this is a cute idea. I am obsessed with the modernized mercury glass holiday items. You can find everything Mercury at Home Goods...aka Hostess Heaven!
So what's your favorite thing about Thanksgiving??

Also, in a few weeks my sister, Merrill and I will be throwing our dear friend Hannah a Winter Wonderland Birthday Dinner...I can't post anything yet in case she looks at the blog so stay tuned :)


XOXO
Mrs. S

Friday, October 21, 2011

Crazy about Cloches!!!

Todays Topic is CLOCHES!!!


A while back when my cousin Brooke took me on my first adventure to the flea market, she gave me the most amazing idea to fill a glass bell jar.... or Cloche as I love to call it...with treasures. Hers had a very eclectic painting under it that fit with her Better Homes and Gardens beach themed living room. It has since been re-developed into a nautical bliss!!  check it out!!
I purchased a glass cloche and stand at the flea market and took my time to figure out what unique items I wanted to fill it with. If any of you know me well...you know I LOVE BUNNIES!!! Sooo..I made an ode to bunny!!
The best part of cloches is that you can change them all year round!
You can find cloches at Michaels, online at specialty stores and of course at any flea market.

I hope all of you will have the opportunity to turn such a simple idea into something creative and over the top for your holidays!!

XOXO Mrs. S

(images found on google image search)

Monday, August 15, 2011

Sorry Readers...I've been a very bad Blogger!!

Sorry guys!! My busy season is HERE!!! I will try my best to get some good stuff coming to you over the next few weeks and months but I will be out of town for weeks at a time.  Unfortunately that means I won't have as much time to do fun projects as I would like.

I'm learning something new though....how to crackle paint with Elmers Glue...

I'll post an update on it when I actually have time to do it!!

On another note...I found a home for my little Italian bust. I dressed her in a vintage necklace and nestled her between some twigs covered in Spanish moss that I picked up on a vineyard on my most recent trip to the central coast and placed them in a lantern...she likes her new home :)


That's all for now!! Preparing for a big meeting on Friday so I gotta run!!

XOXO,

Mrs. S

Tuesday, August 2, 2011

The Makings of a FABULOUS new headboard!!!

For months and months I have been eyeing the most gorgeous upholstered beds and headboards from all sorts of different shopping avenues....

Like this one from SerenaAndLily.com for the cool price of $2,400.00 oh and $300 shipping.....GASPPP!!
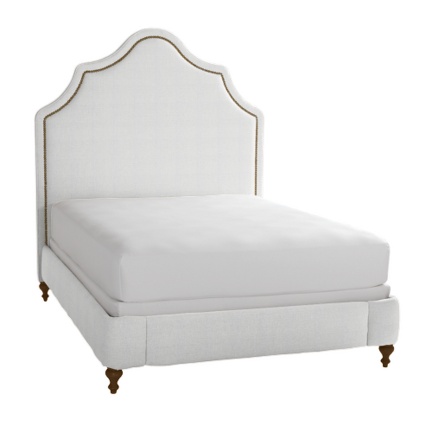
Pondicherry Bed with Nailheads

Or this one from Ballard Design for $739.00...and $70.00 shipping...
Stevenson Nailhead Headboard

Or how about this FABULOUS number from Deco by Designers Inc....makes me think of one of my best friends Ruthie...it's literally screaming her name!!! Their prices START at $500 for a twin bed....

motif-headboard-w_-nail-head-design_queen_king

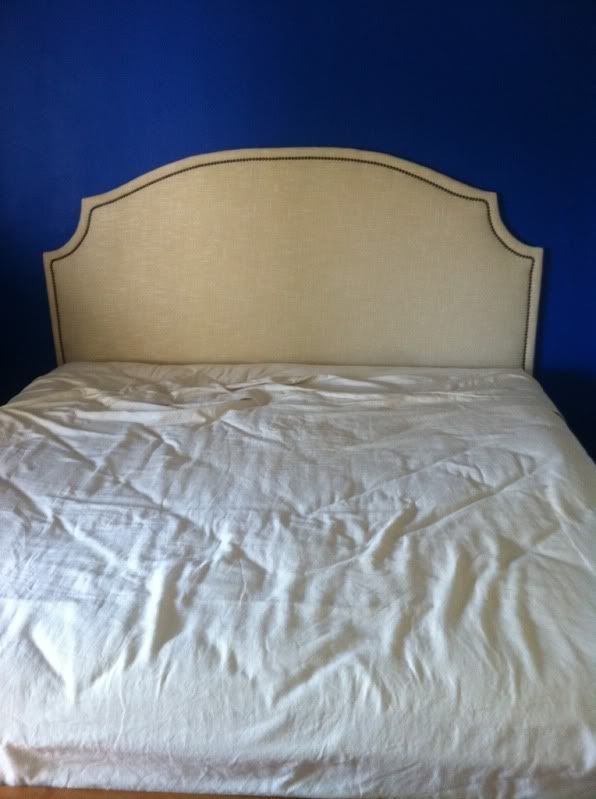
And finally there is this simple and chic hang on the wall headboard with a gorgeous Rustic nailhead trim made by......ME (and HB too!!)

So how did we make this chic and AFFORDABLE headboard you might ask?? It's simple....lets do this step by step...

Materials:
Large piece of Plywood 1/2" to1" thick...make sure to measure the length of your mattress ahead of time and add one inch to each side for the perfect sized headboard.
2-3 layers of batting (found mine at Joanne's and needed 14 ft for a king bed)
Staple Gun
Scissors
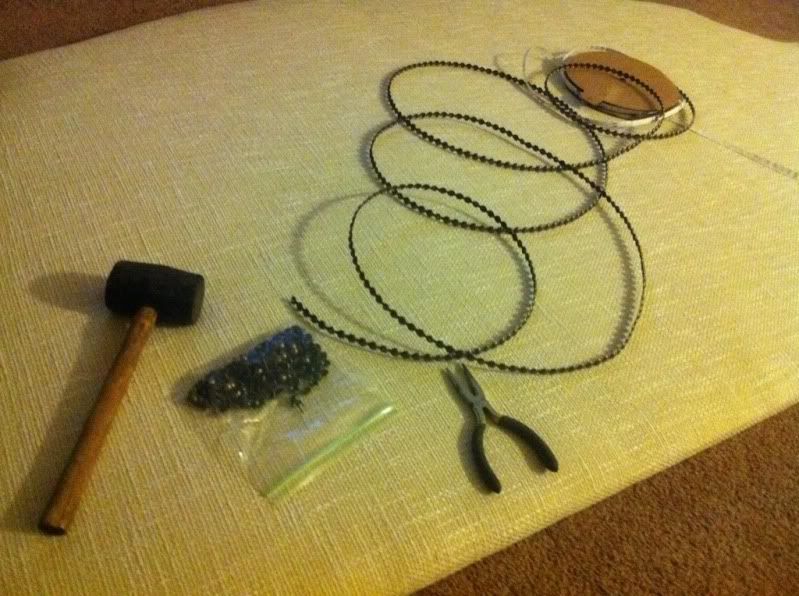
Rubber Mallet
Needle Nose Pliers
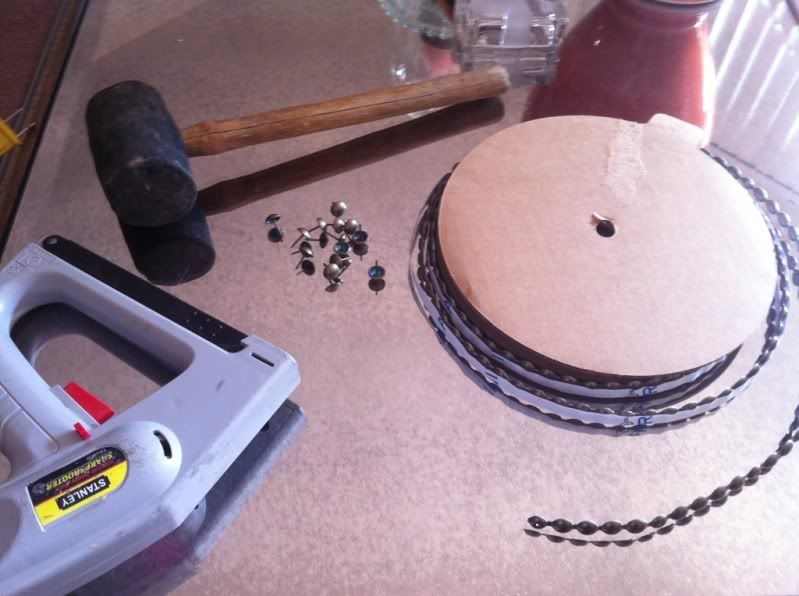
Nailhead Trim Kit (Found mine on Ebay for $9!!)
Interlocking Bracket Wall Kit


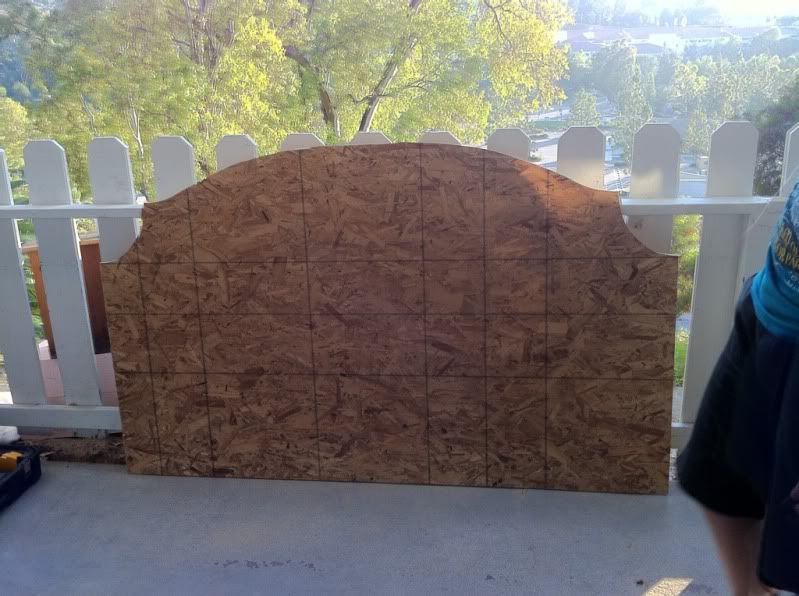
Depending on what shape you want your headboard to be, the height should be between 36 to 48 inches. HB and I wanted the curved corners so we chose 48"  to give the bed some height in the middle. The shape must be drawn on the wood, cut with a jigsaw and then sanded down. To get the most even shape on both sides, we flipped the plywood corner from our original cut and traced the shape!
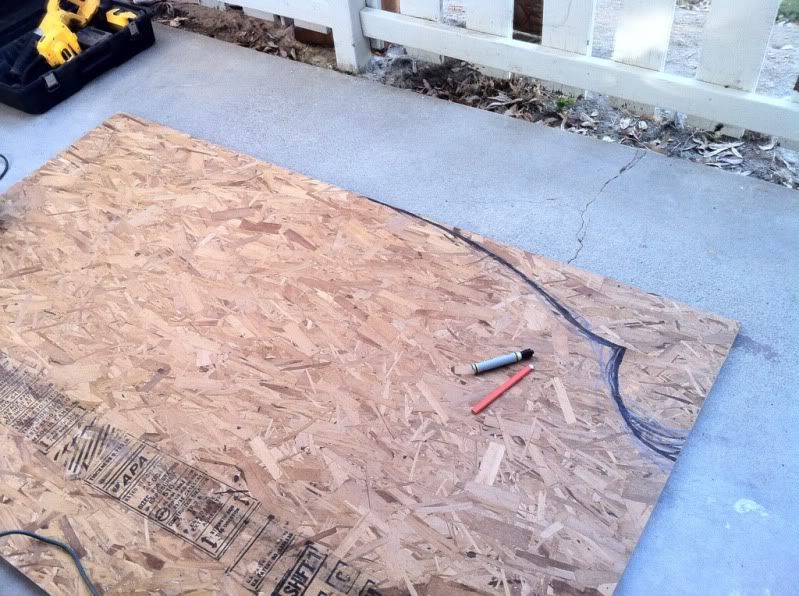
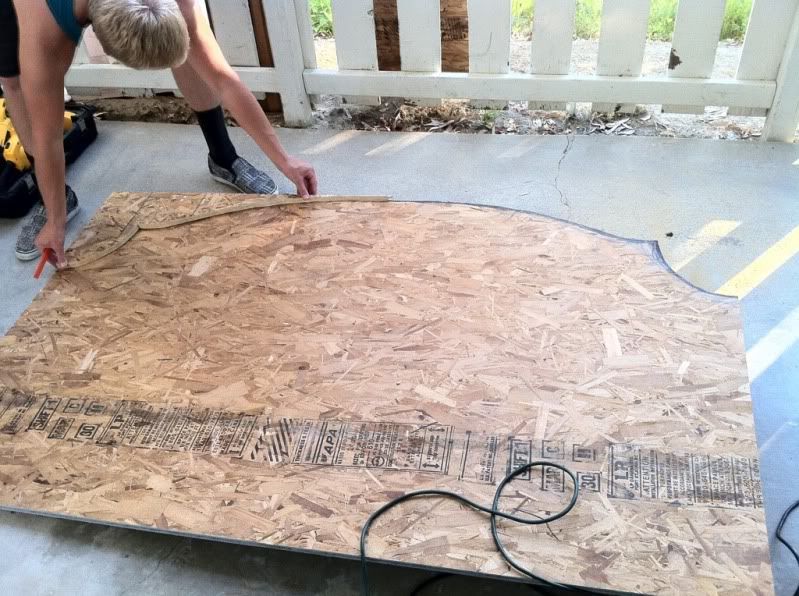


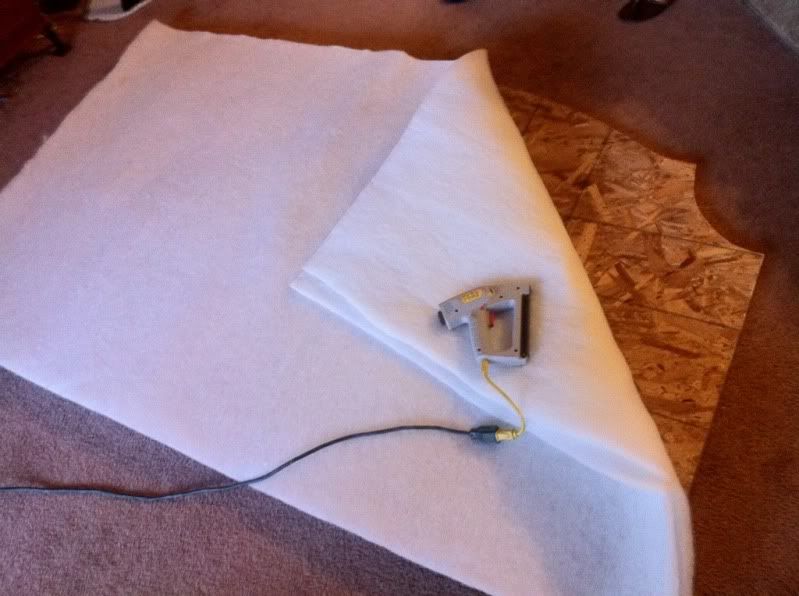
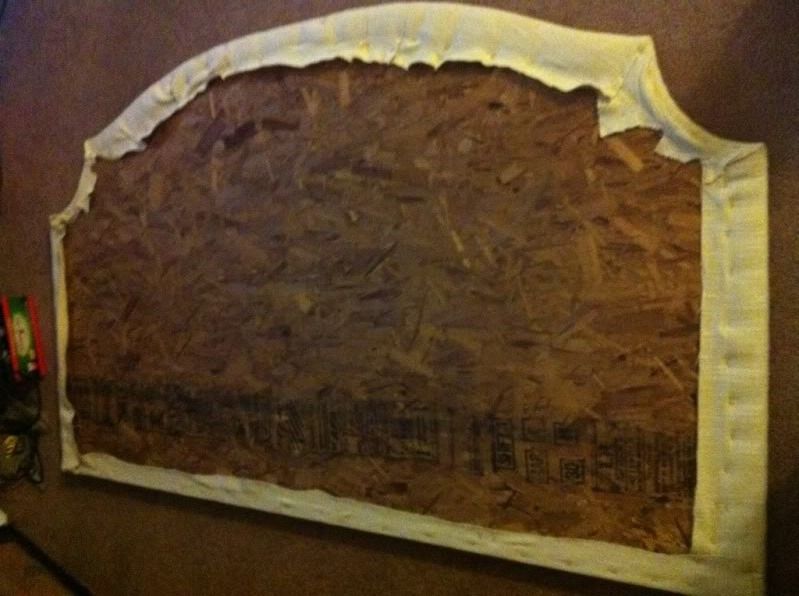
Next, we laid the board on our living room floor and smoothed down two layers of batting to the front and flipped the board over to staple the batting to the back side. Make sure the batting is TIGHT so it doesn't ripple later on under the fabric. I also cut off extra batting from around the corners so it wouldn't make the headboard stick out from the wall too far. 
I did the same exact thing with the fabric, except this time i made two staple in the front, which I later removed,  to hold the fabric in place while I flipped the board around. I chose a very thick and textured fabric from Joanne's by Robert Allan in the color Sand. It was on sale and I had a 20% off coupon :) Here you can see the detail in the fabric....GORGEOUS I KNOW!!

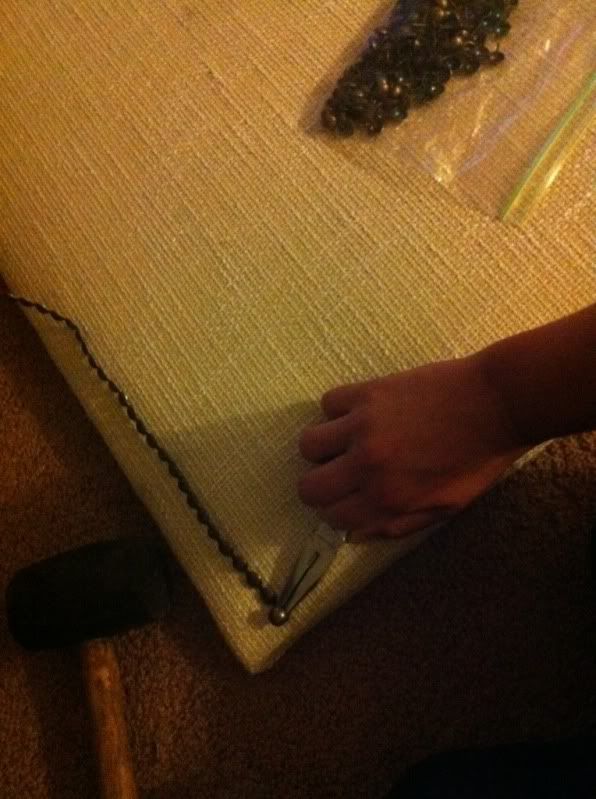
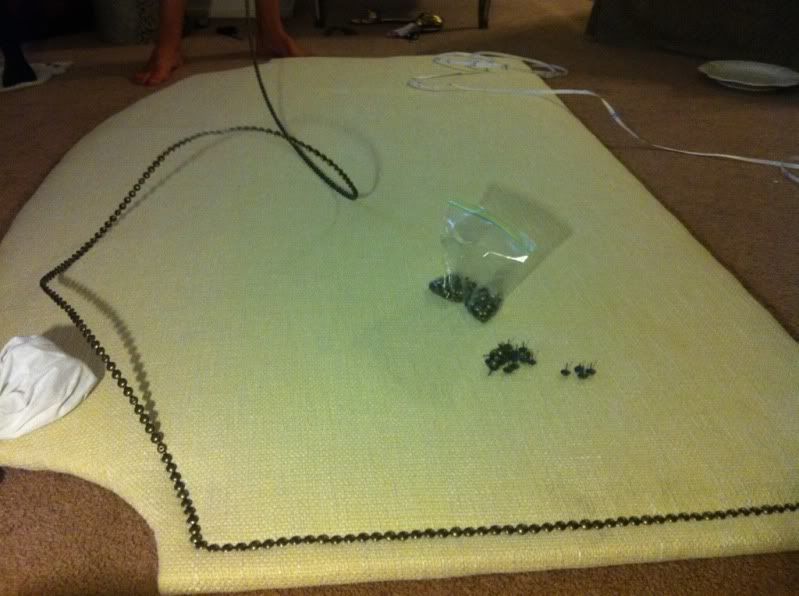
Next is the nailhead trim WHICH IS SOOOOO EASY TO DO!! I was amazed!! Once you figure out how far you want the trim to be from the edge of the board it is so easy to keep a straight line! I chose to have the trim approx 1" from the edges. Just hold the trim down, place the nailhead in and hold it with the pliers and hammer it in your the mallet. **NOTE** I ended up covering the mallet with a white dish towel since it started to leave black residue on the fabric!!


Once you have completed nailing in the trim, give the whole trim a good hammering to ensure everything is in place before you lift it up. The final step is attach the interlocking bracket to both the headboard and the wall. The bracket can be found at home depot and we chose one that could hold up to 100 lbs just to be on the safe side.
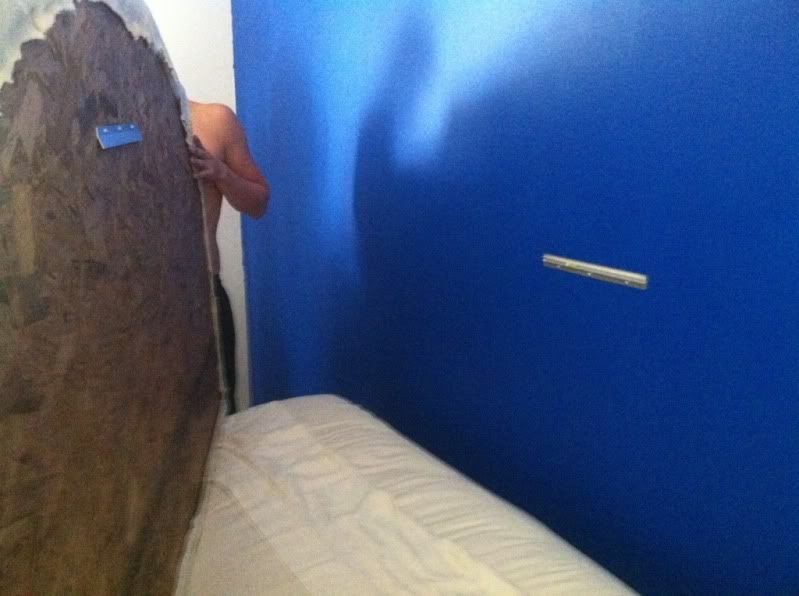
Just like hanging a picture, you slide your headboard down the wall until both pieces of metal lock in place....and VOILA!!


Total Cost Breakdown:

Fabric (2.5 yards): $46
Wood: $13
Nailheads:$9
Batting: $25
Wall Clips: $10

Total: $103

BEAT THAT YOU OVERPRICED INTERIOR DESIGNERS!!!

XOXO,

Mrs. S

PS: If I didn't explain anything well enough...please ask and I will make sure to re-vamp the directions to cater to my reader!! xx

Wednesday, July 27, 2011

It all started with the Headboard....

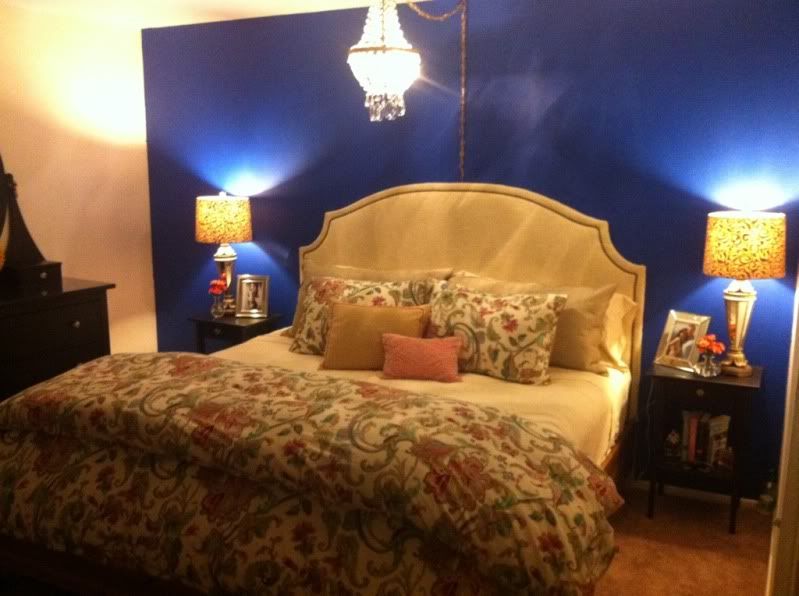
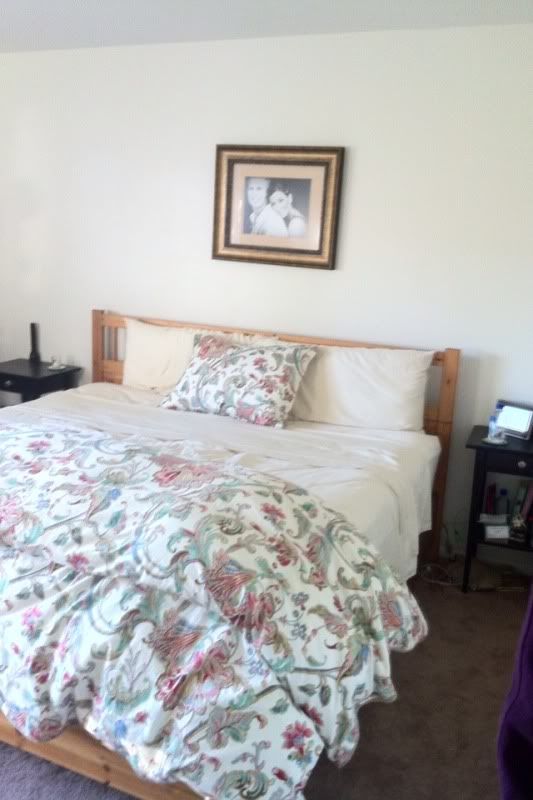
...And ended with re-decorating our ENTIRE room. Well, it needed it to say the least. Granted we have only been married and living together for two months now so it's not as though this was an overdue project or anything. I just had the itch to make our PB&J apartment our home. I posted on facebook a teaser picture of our room before....
Bland...boring...but live-able. All I wanted to do was make a new upholstered headboard....and the ITCH hit me...add pillows paint the wall...rearrange lamps...and finally restore that old chandelier that's been sitting in the corner of our apartment.

DRUM ROLL PLEASEEEEE....


EEEEEEEKKKKK!! I mean seriously, I feel like I am on CLOUD 9!!! The best part is...the TOTAL makeover cost $138. NO JOKE!! The headboard cost $103. Fixing the wiring on the chandelier $5 and the paint was $30.

I can't wait to blog in detail about how to make the headboard and also how we cleaned up the chandelier :)

I have to give a BIG THANK YOU to my darling HB...for his patience, tool box and handiness...I don't know what I would do without that amazing man in my life.

I hope you enjoy!! And thank you in advance for any comments....i really enjoy reading them and connecting with my readers!!

XOXO,
Mrs. S


Thursday, July 14, 2011

Hunny Buns(HB) scored some KILLER DEALS!!

My darling husband has started me on this craze to complete my mirrored furniture collection ever since he gifted me with my first piece on our wedding day....the gorgeous three drawer borghese dresser. From there we found our coffee table and side table on craigslist and bargained our way down to an incredible price.

Fast forward to a few week later and Brett scored the deal of the century on some furniture that definitely need/ed our help but were things that couldn't be passed up.

So here is how it happened...a few months ago my mom sent me an email saying that one of our favorite "kitchy" stores was going out of business, Mainly Seconds on Tustin Avenue in Orange.


As the weeks passed the deals going on in that store kept getting better and better...I happened to stop by the week before the closing to find bare shelves and whole lot of broken furniture leftovers. I briefly perused the aisles until I came to the glorious mirrored furniture corner where just about everything was held together by saran wrap and tape. There I saw a gorgeous six drawer hutch, that was missing two drawers and all of the knobs...marked for $299 with 60% off. I tried bargaining with the salesperson but with no luck I walked out of the store empty handed. The following week I called the store to see when their last day of business was and just about flipped when they said they were closing their doors for good in ONE HOUR!!! I immediately called Brett to see if he could run over and just browse through the leftovers to see if there was ANYTHING that could be salvaged at a good price.

And here is where he hit the HOME RUN...he scored not ONE but TWO mirrored pieces for TWENTY FIVE DOLLARS!!! I KID YOU NOT!!! $12.50 per piece!! I just about fell out of my chair when he told me that!! He purchased the six drawer hutch and a side table that has a small broken piece of glass in one corner but other than that its perfect!!


As you can see I filled the two spaces where the drawers are missing with beautiful crystal candle holders and replaced the knobs with some floral ones I found at Home Goods for $5. (Pardon the tool box and project to be of reconstructing the vintage chandelier on the floor)


And then we have the side table...I tried to get a close up of the crack...it won't cost much to have the mirror replaced thankfully :) I'm going to paint the white part gold to match the rest of the furniture.


And then just a few (poor quality camera phone) pictures to show you the three drawer and matching Borghese side table in our room. Things are finally starting to come together in our little PB&J apartment :)


More than anything I would LOVE to paint the walls and hang curtains etc etc...but I just have to keep thinking "this is not your FOREVER home....just temporary....you will soon have a house where HB will let you decorate your little heart out!!!"

Update: Scored HUGE savings at Joannes fabrics with an online coupon and digging through the last call bin...found the fabric for the headboard!! Can't spill anymore than that though :) STAY TUNED!!


XOXO,

Mrs. S


Wednesday, July 13, 2011

Newest Obsession: Rose Bowl Flea Market

If any of you lucky and fabulous readers live in or around the LA area you MUST go to the Rose Bowl Flea Market at some point in your life. It is a for sure bucket list item!! The Flea Market is held the 2nd Sunday of every month and I had the privilege of going this past Sunday with two wonderful people, my cousin Brooke and dear friend Amber. Brooke has been visiting the flea market along with other fabulous vintage shops for years and taught me the tricks of the trade as we walked along the rows and rows of booths and "shops".


I happened to find some incredible things while I was there and drooled over a bajillion other items too...here is what I walked away with :

Crystal Chandelier Floor Lamp


Set of Turquoise Brushes and Hand Mirror (reminds me of a set my mom has)


And a cake stand with a glass top...for now I filled it with a broken tea cup candle and placed it on top of another cake stand.


What I find hilarious about the fact of now becoming obsessed with the flea market is that I do not consider myself a "digger" by any means. I hate "digging" for clothes at stores like Forever 21 or vintage stores...but this is more of a mission. Shops are continuously putting out new items throughout the day and bargaining is totally accepted. I'm on the hunt for new places like this in the OC/LA area!!

Any recommendations friends??

On a side note...I'm totally on a kick to start working on our upholstered bed. HB is out of town on business right now so I must be patient for his return to help me work the Jig Saw...I did purchase the Nail Head trim #5 for $8 on eBay though :)

Stay tuned for more....I'll blog about bargain furniture Brett picked up from a store that was closing!!

XOXO

Mrs S.

Friday, July 8, 2011

Cool Down with a Blueberry Lemon Drop

Ugh is it HOTTTTT!!! WOOOOOWEEEE....and it's Friday therefore all I can think about is my little boo boo's party tomorrow and cool bevies!!

First of all Lets start of with a VERY VERY HAPPY ONE YEAR BIRTHDAY to little boo boo bunny BRODY!! Here he is enjoying his first cupcake on Tuesday!!


He is having a very special Dr. Seuss themed bash...Obvi he is Thing 1!!


Next Topic of discussion is a fabulous Blueberry Lemon Drop Martini that will keep you cool this weekend!! This is my newest and most favorite drink du jour:)
This is the recipe I found online...but i made my own modifications as shown in PINK...


Blueberry Lemon Drop

3/4 shot Absolut citron
3/4 shot Stolichnaya blueberry vodka
1/2 ounce fresh squeezed lemon juice
1 1/2 ounces simple syrup (sugar and water)  EEW GROSS!! Use Agave nectar instead...just a few drops goes a LONG way!! Shake with crushed ice, strain, serve in martini glass with sugar around rim. No Sugar needed!!
Garnish with a couple of blueberries. Better with the lemon slice...blueberries can get mushy and they stain your teeth! YIKES! 

AND VOILA!! You have the perfect summer sizzler!!


Keep Cool and Check back soon for some design updates!!

XOXO, Mrs S